The Assembly
From roughly the late 1970s through the early 2000s, there was one standard way to finish a basement in this part of Pennsylvania. Erect a wood stud wall directly against the foundation. Install fiberglass batt insulation between the studs. Hang paper-faced drywall over it. Carpet on the slab.
This was not a cowboy practice. It was normal, it was code-compliant, it is what every builder and every weekend homeowner did, and it is present in tens of thousands of homes across Chesterbrook, Blue Bell, Collegeville, North Wales, Lansdale, Royersford, King of Prussia and every subdivision built in those decades.
It is also, in this climate, close to a designed failure. Here is why, element by element.
Why Each Layer Is Wrong
The foundation wall is cold, and stays cold
A buried masonry wall is in thermal contact with the ground, and deep soil in southeastern Pennsylvania holds a temperature of roughly 52 to 58°F year round. It does not warm up in July, because the soil around it does not warm up in July.
Now consider the air. From June through September, outdoor dew points in this region run in the mid-60s to low 70s°F for weeks at a time. Dew point is the temperature at which air must release its water as liquid. Air with a 68°F dew point arriving at a 55°F surface is thirteen degrees below its dew point at that surface. It has no choice but to condense.
Fiberglass does not stop air, and does not stop vapour
This is the misconception that does the damage. Fiberglass batt is an air filter, not an air barrier. Air moves through it freely, carrying its water vapour with it, and reaches the cold masonry behind. The insulation does not protect the wall cavity from the humidity in the room; it merely slows the airflow slightly on the way through.
Once damp, fiberglass holds moisture against the drywall
Wet fiberglass does not drain and does not dry quickly in a sealed cavity with no airflow. It sits in contact with the back of the gypsum board, keeping it damp. It also loses most of its insulating value while wet, which makes the wall colder, which increases condensation. The failure is self-reinforcing.
Drywall paper facing is cellulose
The paper on both faces of gypsum board is a cellulose product, and cellulose is close to an ideal fungal substrate. In a dark, still, humid, sealed cavity at a comfortable temperature, it is about as favourable an environment as fungi encounter in a building.
And the whole thing is invisible
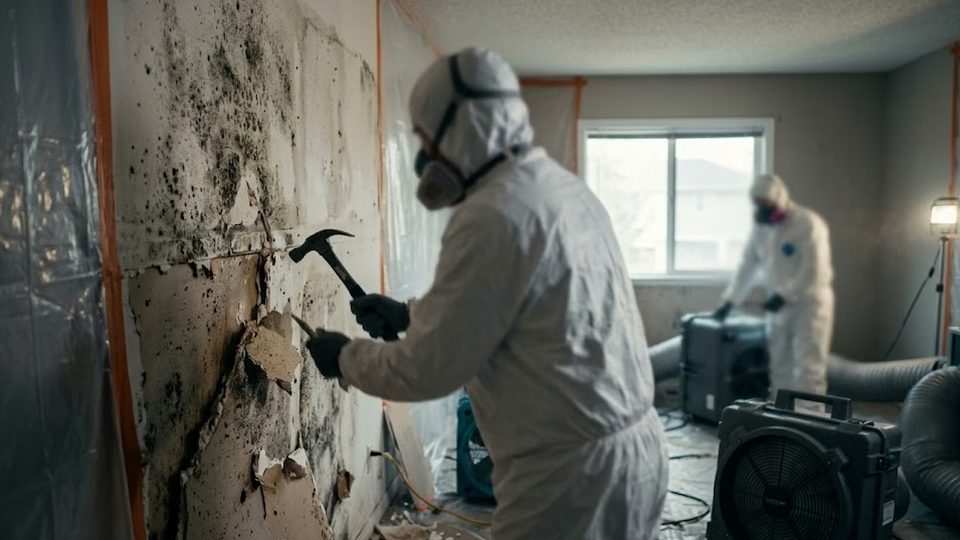
This is why the problem is so consistently discovered late. Growth begins on the concealed face of the drywall — the side facing the cavity. It can progress for years before enough microbial VOC production reaches the room to be noticed as an odour, and considerably longer before anything appears on the finished side. When the wall is finally opened, homeowners are routinely shocked: the room-facing side is immaculate, and the back is black.
If the musty smell in your finished basement is worse in July and August and better in January, that is not a coincidence and it is not a leak. It is the summer condensation cycle running behind the wall. A leak does not behave seasonally in that pattern.
How to Find Out Without Demolishing Anything
You do not have to take the wall apart to know. The sequence a competent inspector follows, in order of invasiveness:
- Ask the seasonal question firstWorse in summer, better in winter, no rain correlation. That pattern alone identifies the mechanism before any instrument comes out.
- Measure the roomA hygrometer plus an infrared thermometer. Calculate the dew point of the room air and compare it to the measured surface temperature of an exposed section of foundation wall. If the surface is colder, the wall is condensing right now.
- Moisture-map the bottom of the wallA pinless meter swept along the bottom twelve inches of drywall and the baseboard line. Elevated readings define where the problem is.
- Thermal scan the full wallLooks for cold plumes and for areas where the insulation has slumped or is wet. Always confirmed with a meter — a thermal image on its own proves nothing.
- Borescope through a single portA hole roughly the diameter of a pencil, placed low on the wall where a baseboard will cover the repair, or inside a closet. A camera on a flexible shaft then shows you the back of the drywall and the condition of the insulation directly. This is the step that settles it, and the repair is invisible.
- Cavity air sampling if neededThrough the same port. Samples the air inside the assembly rather than the room, which is the only meaningful measurement when the cavity is sealed from the room.
The Assembly That Works Instead
This is the practical payoff of the whole article. If you are remediating a failed basement, or finishing one for the first time, the principle is: put the insulation on the outside of the moisture-sensitive material, and do not create a cavity where humid air can reach a cold surface.
| Layer | Conventional (fails) | What to build instead |
|---|---|---|
| Against the masonry | Nothing — the stud wall sits on it | Rigid foam board, XPS or foil-faced polyiso, adhered or fastened, seams taped. This is the critical layer. |
| Framing | Studs in contact with the foundation | Stud wall built in front of the foam, clear of the masonry |
| Cavity insulation | Fiberglass batt | Mineral wool — hydrophobic, does not support growth — or nothing at all |
| Wall board | Paper-faced gypsum | Paperless fibreglass-mat-faced gypsum, or cement board |
| Floor | Carpet and pad on the slab | Dimpled membrane with a floating floor, sealed concrete, or below-grade-rated LVP |
| Rim joist | Bare fiberglass batt | Closed-cell spray foam, or cut-and-sealed rigid foam |
| Humidity control | None, or a bucket dehumidifier | Correctly sized dehumidifier plumbed to a drain, set to 45–50% |
Why the rigid foam is the pivotal change: it raises the temperature of the first interior surface above the dew point of the room air, so condensation cannot occur there. And foam itself is unaffected by moisture — it neither absorbs it nor feeds anything. The cold surface still exists, behind the foam, but there is no humid air able to reach it and nothing organic in contact with it.
The cost difference over a conventional build is roughly fifteen to twenty percent. Against the cost of gutting and rebuilding the same basement in a decade, it is the least controversial money in the entire project.
Before You Build Anything
Three things first, in this order, and none of them are expensive:
Fix the exterior water. Clear the gutters. Extend every downspout to discharge at least six feet from the foundation. Correct grading that has settled over the decades so that it now falls toward the house. Nothing built inside survives an uncorrected exterior problem, and a surprising share of basement moisture resolves at this stage alone.
Sort out the sump. Correctly sized pump, working check valve, sealed pit cover, and a battery or water-powered backup. In this county a backup is not optional equipment — pumps fail during precisely the storms that need them, and the power cut arrives with the rain.
Run a dehumidifier for a full summer and watch. Put a hygrometer down there. Learn how the space actually behaves across June, July and August before you cover the wall up. This is the cheapest possible insurance against an expensive mistake.
Whatever you build, put one or two removable access panels into the new wall in low-visibility locations — inside a closet, behind a future bookcase. In ten years, being able to look behind the wall without demolishing it is worth far more than the ten minutes it costs to install them.
Questions This Article Raises Most Often
Yes. The standard approach is a borescope port — a hole roughly the diameter of a pencil, drilled low on the wall where a baseboard will cover it, or inside a closet. A camera on a flexible shaft then shows the back of the drywall, the condition of the insulation and the bottom plate directly. The same port can be used for cavity air sampling, which measures the air inside the assembly rather than the air in the room. That distinction matters: a room sample can read perfectly normal while the cavity behind the wall is heavily contaminated, because the wall is substantially sealed from the room.
Roughly fifteen to twenty percent on the wall build-up. The rigid foam board is the main added item, at perhaps $1.50 to $3.00 per square foot of wall installed. Paperless gypsum board costs a few dollars more per sheet than standard. Mineral wool costs more than fiberglass but you may not need cavity insulation at all once the foam is there. Against a full basement remediation and rebuild running $10,000 to $25,000, the premium is small and it is the difference between an assembly that lasts and one you tear out again.
Yes, and it is cheap. Put a hygrometer in the space and watch it across a summer — sustained readings above 55 percent mean cool surfaces are condensing. Fit one or two removable access panels into the wall in low-visibility spots so the cavity can be looked at in future without demolition. Some owners also place a small wireless temperature and humidity sensor inside the wall cavity itself through an existing port, which gives you the reading that actually matters. None of that stops a failure, but it means you find out in month three rather than year eight.
Partly, and less than people assume. Lowering the room humidity does reduce the vapour available to move into the cavity, so it genuinely helps. But the cavity is substantially sealed from the room, it has its own microclimate, and the cold masonry surface is still there behind the insulation. A dehumidifier is a worthwhile mitigation for an existing wall you are not ready to rebuild; it is not a substitute for getting the assembly right when you do.