Rebuilding Is Where You Decide Whether It Happens Again
Remediation removes. Repair puts back. It is the phase homeowners think least about and the one with the greatest influence on whether they are doing this again in eight years.
The reason is simple. A failed basement wall, a rotted rim joist, a mold-damaged bathroom — each failed because of how it was built. Rebuilding it the same way reproduces the same assembly in the same conditions and delivers the same result on the same timescale. The remediation was not wasted, but it was only half the job.
“What about this assembly caused it to fail, and what are we doing differently?” If the answer is “nothing, we're putting it back as it was”, you are buying a repeat. There is almost always a better assembly available for a modest premium, and the moment to specify it is now, while the wall is open.
Sequence: Clearance First, Always
Reconstruction begins only after independent clearance testing has passed and the containment has come down. Building over a space that has not been verified means that if it later fails, the new work comes out again. This sequence is not negotiable and any contractor proposing to rebuild before clearance should be questioned.
What Typically Needs Rebuilding
| Element | Standard rebuild | Better specification |
|---|---|---|
| Basement wall assembly | Stud wall on the foundation, fiberglass batt, paper-faced drywall | Rigid foam against the masonry, framing held off the wall, mineral wool, paperless gypsum |
| Basement flooring | Carpet and pad directly on the slab | Dimpled membrane with a floating floor, sealed concrete, or below-grade rated LVP |
| Rim / band joist | Bare fiberglass batt stuffed into the bay | Closed-cell spray foam, or cut-and-sealed rigid foam |
| Bathroom wet wall | Standard drywall behind tile | Cement board or a foam tile backer with a bonded waterproof membrane |
| Bathroom ceiling and fan | Replace the drywall, reconnect the existing fan | Correctly sized fan on a timer, insulated duct, terminated through the roof or gable with a damper |
| Attic insulation | Blow it straight back in | Air-seal the ceiling plane first, install baffles, then insulate to current depth |
| Crawl space | New batts between the floor joists | Insulate the perimeter wall instead; sealed vapour barrier; dehumidification |
| Kitchen base cabinets | Replace like for like | Plywood carcass rather than particleboard; sealed toe kick; leak sensor under the sink |
| Exterior trim and sills | Replace in wood | PVC or composite at the vulnerable locations, with proper flashing and back-priming |
The Basement Rebuild, in Detail
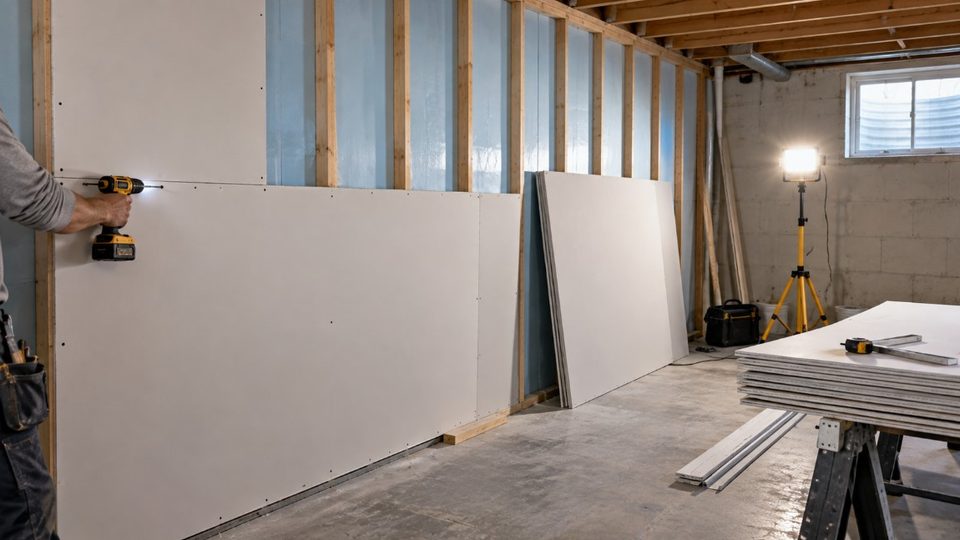
This is the most common reconstruction in this region and the one where the specification matters most. If you are rebuilding a finished basement after a mold failure, this section is the practical payoff of the whole project.
- Correct the exterior water before anything goes backGutters clear, downspouts discharging six feet or more from the wall, grading falling away for the first ten feet, window wells drained. Nothing built inside survives an uncorrected exterior problem.
- Deal with the sump properlyCorrectly sized pump, functioning check valve, sealed pit cover, and a battery or water-powered backup. In this county a backup is not a luxury — pumps fail during the storms that need them.
- Rigid foam directly against the masonryXPS or foil-faced polyisocyanurate, adhered or mechanically fastened, seams taped. This raises the interior surface temperature above the dew point and is itself unharmed by moisture. This single layer is what makes the difference.
- Frame in front of the foamThe stud wall stands clear of the masonry rather than against it. Where extra insulation is wanted, mineral wool rather than fiberglass — it is hydrophobic and does not support growth.
- Paperless gypsum boardFibreglass-mat-faced board or cement board. Removes the cellulose substrate entirely for a few dollars more per sheet.
- Flooring that tolerates a damp slabNo carpet pad on concrete. A dimpled membrane creates an air gap and a capillary break beneath a floating floor; sealed and finished concrete is the simplest durable option.
- Insulate the rim joist and cold water linesClosed-cell foam at the rim; pipe insulation on cold supply lines so they stop dripping in August.
- Permanent dehumidificationCorrectly sized, plumbed to the sump or a floor drain, set to 45–50%. And leave an access panel or two in the new wall so the assembly can be inspected in future without demolition.
Older and Historic Properties
Repair in the pre-1900 stone housing of Gulph Mills, Valley Forge, Wayne, Villanova and old Norristown follows different rules, and applying modern practice to these buildings causes real damage.
Use lime, not Portland cement. Repointing historic stone with modern cement mortar creates joints harder and far less permeable than the stone. Moisture that previously evaporated through the soft joint is forced to exit through the stone face instead, which spalls it. Lime mortar is the correct material and it is not merely a conservation preference — it is what keeps the wall working.
Keep the assembly vapour-open. No impermeable coatings, no sealed stud cavities against the stone, no vapour barriers on the interior face of a wall that has no way of keeping water out. These buildings stay sound by drying inward.
Expect asbestos and lead. Any property built before 1978 may contain lead paint, and pre-1980 buildings frequently contain asbestos in pipe lagging, floor tile, mastic, and textured finishes. Disturbing either during repair carries legal and health obligations distinct from the mold work. Testing before demolition is far cheaper than discovering it midway.
Match what is there. Plaster on wood lath behaves differently from drywall and, in a historic interior, replacing a section of failed plaster with a drywall patch creates a visible and permanent discontinuity. Skim-coat plaster over blue board is the usual compromise; full three-coat plaster where the interior warrants it.
Cost, and How to Compare Bids Honestly
Reconstruction should be quoted separately from remediation. Bundled into a single number, you cannot tell whether you are paying too much for the drying or too little for the rebuild, and you cannot compare two proposals meaningfully.
General market ranges for this area: basic basement reconstruction — framing, insulation, drywall, paint, basic flooring — roughly $25 to $60 per square foot depending on finish level. Bathroom rebuild after remediation, roughly $6,000 to $25,000. Attic insulation and air sealing, roughly $2,500 to $7,000. Drywall replacement alone, roughly $3 to $7 per square foot installed and finished. Kitchen cabinetry replacement varies enormously with specification.
One legal point specific to Pennsylvania: while mold remediation is unlicensed here, home improvement work is regulated. Contractors performing construction and repair must be registered under the Home Improvement Consumer Protection Act, and their PA HIC number can be checked free through the Office of Attorney General. The Act also requires a written contract containing specified terms for work over a threshold amount. This is a genuine consumer protection and it applies to the reconstruction phase even though it does not apply to the remediation phase — so ask for the number.
Frequently Asked Questions
It can be convenient and it is common, particularly where an insurance claim is involved and a single point of accountability helps. The thing to insist on regardless is that the two are quoted as separate line items, and that clearance testing is performed by a genuinely independent third party in between. The risk with a single bundled number is that you cannot see what you are paying for either phase, and the contractor has an incentive to move quickly from one to the other — including past the clearance step. Separate the pricing and keep the clearance independent, and the single-contractor arrangement is fine.
Where the underlying cause is a covered peril, most policies cover repair of the damaged property, which includes putting back what remediation removed. Two important qualifications. First, many Pennsylvania policies carry a specific mold sublimit, commonly $5,000 to $10,000, which can be consumed by the remediation alone and leave nothing for the rebuild. Second, insurance pays to restore what was there, not to upgrade it — so if you want the better wall assembly described above, expect to pay the difference yourself. That difference is usually modest and it is, in our view, the best money in the whole project.
As soon as the independent clearance test has passed and the containment has been removed. In practice that is often only a day or two after the drying equipment comes out, since the clearance assessor typically attends the day after shutdown and laboratory turnaround is two to five business days. Do not let reconstruction begin before the result is back, however convenient the scheduling. Rebuilding over an unverified space means that if it later fails, the new work comes out again — and that has happened to enough people to be worth the wait.
Framing, insulation and drywall are within reach of a capable DIY homeowner, and doing it yourself is a legitimate way to control cost. Three cautions. First, get the assembly right — rigid foam against the masonry, framing held off the wall, paperless board, no carpet pad on the slab. Doing it yourself with the conventional assembly saves money now and costs more later. Second, Upper Merion and most Montgomery County municipalities require permits for finishing a basement, and permits matter at resale. Third, anything involving electrical or plumbing alteration generally requires licensed trades and inspection. A reasonable middle path is to have a contractor handle the insulation and air sealing, which is where the technical risk sits, and do the finishing yourself.
Not for the masonry, and this genuinely matters. Repointing historic stone with modern Portland cement mortar is one of the most common and most damaging things done to these buildings. The cement joint is harder and much less permeable than the surrounding stone, so moisture that used to evaporate harmlessly through the soft lime joint is forced out through the face of the stone instead, spalling and eventually destroying it. Lime mortar is the correct material. The same principle applies to interior finishes: keep them vapour-open, avoid sealed cavities against the stone, and do not apply impermeable coatings. Find a mason with genuine historic experience — there are good ones in this region, because there is a great deal of this building stock.